


TS combination type Aviation Obstruction Light is the latest generation of Aviation Obstruction Light which is developed and manufactured in strict accordance with the requirements and standard set forth in the fourteenth volume of the standard attachment of ICAO, the China’s Civil Aviation Industry Standard MH/T6012-1999 and FAA.
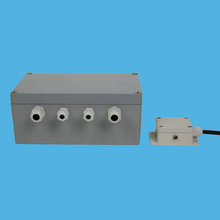
TS combination type Aviation Obstruction Light is made up of TS-C-1 Aviation Obstruction Light controller and TS-SL Aviation Obstruction Light. This system is supplied by 220VAC power source and illuminated by large-power LED, with LED life time of 100,000 hours. If calculated by 10 hours of night illumination everyday, it can be used for more than 22 years.
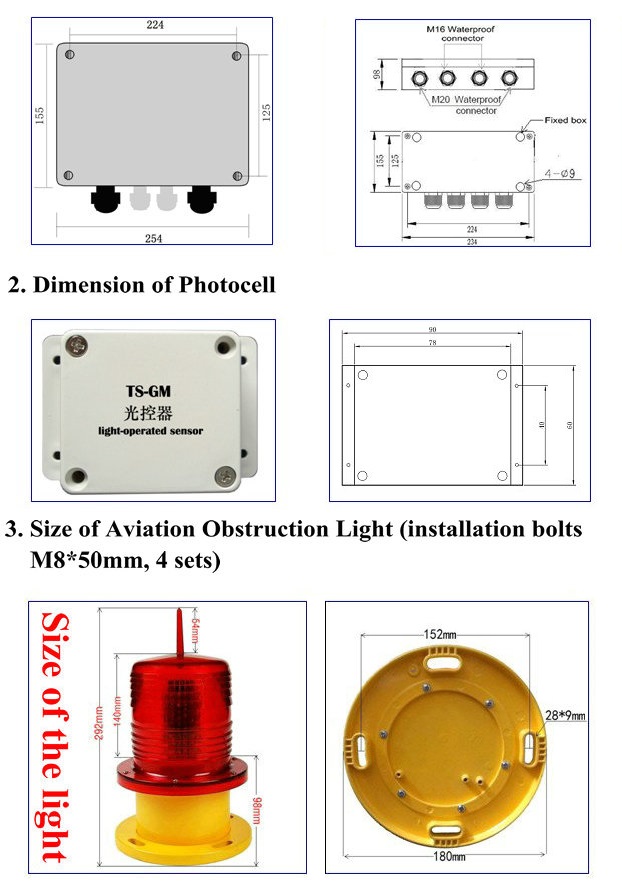
II. Structure of the Controller and Aviation Obstruction Light
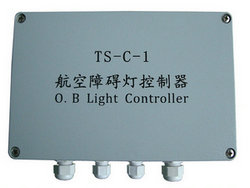
l The controller is the principal part of the Aviation Obstruction Light controller, with its enclosure made of die-casting aluminum and its inner part composed of a lightning protection breaker, a leakage circuit breaker, a control circuit and an alarm system. Its advantages are described as follows:
1. The controller is positioned at the bottom of the tower in such a manner as to facilitate installation;
2. The body of the controller is installed inside the enclosure in such a manner as to facilitate detection and maintenance;
3. With the functions of lighting protection, electric leakage protection, and short circuit protection;
4. With the function of fault alarm (relay dry contact);
5. The Aviation Obstruction Light is switched on or off under the control of external light-operated system.
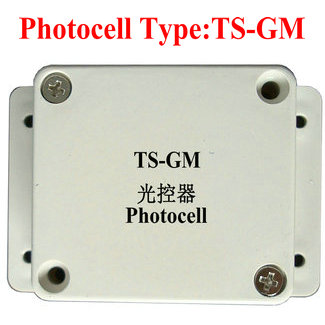
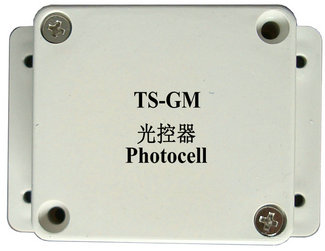
l TS-GM light operator made up of light sensitive receiver tubes is designed to transmit the optical illumination value (light intensity of daytime or night) to the control system. The control system can enable the Aviation Obstruction Light to be switched on or off on the basis of judgment of illumination value. When the daytime illumination is up to 100Lux, the system can automatically enable the Aviation Obstruction Light to be switched off; when the night illumination is up to 70Lux, the system can enable the Aviation Obstruction Light to be switched on.
l TS-SL Aviation Obstruction Light is one of the single light series, with its enclosure made up of PC and die-casting aluminum. It is configured with LED luminescent system, characterized by simple structure of its body, light weight and strong impact resistance. Controlled by the control system and the light-operated system, it can be automatically witched on at night and off in the daytime.
III. Technical Parameters of Control System and Aviation Obstruction Light
1. Technical Parameters of Control System
|
Model |
TS-C-1 |
Material |
Aluminum die casting |
|
Working voltage |
AC 110V ~240V |
Output working voltage |
DC27V±5% |
|
Control mode |
Light-operated |
Number of control branch circuit |
1 |
|
Flash frequency |
Normally on |
Ambient temperature |
-30˚C ~ +70˚C |
|
Protection grade |
IP65 |
Ambient humidity |
10% ~ 95% (non-condensing) |
|
Circuit protection |
Electric leakage and short-circuit protection |
Lighting protection |
AC lightning protection |
|
Alarm output mode |
Relay dry contact alarm output |
Weight |
2.05Kg |
2. Technical Parameters of Light-operator Sensor
|
Model |
TS-GM |
Material |
ABS engineering plastic |
|
Working voltage |
DC1.9~2.1V |
Optical illumination |
70~100 Lux |
|
Ambient temperature |
-30˚C ~ +70˚C |
Weight |
0.3Kg |
3. Technical Parameters of Aviation Obstruction Light
|
Model |
TS-SL |
Material |
PC and Aluminum die casting |
|
Working voltage |
DC24V±10% |
Illuminate color |
Red |
|
luminous intensity |
>32cd |
Illuminate lifespan |
100,000 hours |
|
Flash frequency |
Always on |
Ambient temperature |
-30 ºC~70 ºC |
|
Wind speed |
60m/s |
Visual range |
5Km |
|
Protection grade |
IP65 |
Weight |
1.2Kg |
IIIV. Dimension Drawings of Aviation Obstruction Light and Controller
1. Dimension of Controller
V. Installation Methods
1. Installation Method of Controller
l Unscrew the cover board of the controller and take it away and then make the terminal blocks exposed.
l Thread four M5×150mm screws through the controller fixing hole for fixation with the tower.
l Put AC220V power line through the waterproof connector marked with AC230V to connect with the terminals marked with L, N and GND inside of the controller, and tighten the waterproof connector.
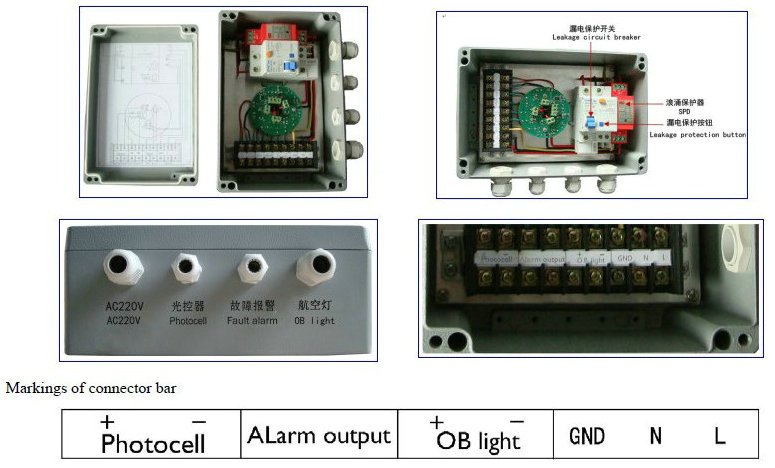
l Put light-operated switch line through the waterproof connector marked with “light-operated”, put cable marked with “+” through the terminal marked with “+” inside of the controller, put cable marked with “-” through the terminal marked with “-” inside of the controller, and tighten the waterproof connector.
l Put fault alarm line through the waterproof connector marked with “Alarm Warning” to connect with the terminal marked with “Alarm Warning” inside of the controller, and tighten the waterproof connector.![]() This alarm is relay dry contact alarm output (passive switch) without anode or cathode.
This alarm is relay dry contact alarm output (passive switch) without anode or cathode.
l Put the connecting lines of Aviation Obstruction Light through the waterproof connector marked with “Aviation Obstruction Light” to the terminals Aviation Obstruction Light marked with “+” and“-” and tighten the waterproof connector.
l Connect the output line of Aviation Obstruction Light and the cables inside of the light, cover the top cover plate of the controller after test, and fix the bolts & nuts.
2. Installation Method of Light Operator
l Put the light operator in the place where light exposure;
l Check the light operator cable with correct polarity inside of the controller;
l Connect electricity power after test.
3. Installation Method of Aviation Obstruction Light
l Connect the cables marked with “+” and “-” from the controller to the two butt terminals marked with “+” and “-” from the light respectively, and fix them with a pair of pliers;
l Check if the “+” and “-” polarity coincides with that controller;
l Electrify and test the working status of the Aviation Obstruction Light, after the working status is normal, push the cables into the waterproof of the body and tighten the water joint.
4. Test Method of Working Status
l Switch “ON” the breaker after AC220 power source is connected, cover the light-operated controller (means night) with black object. In this case, the Aviation Obstruction Light shall be normally on. After the black object is taken down (means daytime), the Aviation Obstruction Light shall be off;
l Working mode of Aviation Obstruction Light: automatically OFF in the daytime FLASHING at night.
VI. Precautions
1. After the cables available for the connection between the Aviation Obstruction Light and the controller shall be threaded through water joints for completion of connection, screws shall be tightened. Note that cables of the controller shall be threaded through the water joints in such a correct way as to avoid the cable frogging inside the controller.
2. The cables inside of the Aviation Obstruction Light shall be labeled with DC+24V and DC-24V. Connect the cables correctly in line with the cable label and the cathode & anode label inside of the light. If the light does not work due to wrong connection of positive and negative electrode, change the cables and connect them.
3. The DC+24V and DC-24V cables are available for connection between the Aviation Obstruction Light and the controller. Attention shall be paid to the positive and negative electrode, for the output voltage from the controller to the Aviation Obstruction Light is DC27V. In case of reversal of positive and negative electrode, the Aviation Obstruction Light will not work but it will not be damaged, unless the AC220V power line is directly connected to the terminal marked with Aviation Obstruction Light.
4. In case of the automatic tripping of the leakage circuit breaker due to the short circuit, the leakage protection button will be popped up. Prior to the reclosure of the breaker, it shall be necessary to press down the blue button first.